Gaia GPS
  • Explore The Map
  • Get the App
  • Upgrade Today
  • Explore The Map Catalog
  • New Features
    • Gaia GPS

      The Hike Map That Broke Me: How Gaia…

      April 24, 2025

      Gaia GPS

      Introducing the Gaia Hike Map: Your Trail-Ready Adventure…

      March 18, 2025

      Gaia GPS

      Unlock a New Level of Personalization in Gaia…

      December 12, 2024

      Gaia GPS

      Goodbye Clutter, Hello Streamlined Maps: Introducing Sync to…

      November 26, 2024

      Gaia GPS

      Discover Prime Stargazing Locations with Our New Light…

      August 15, 2024

      Gaia GPS

      2023 Mapped: Our Best New Features of the…

      December 27, 2023

      Gaia GPS

      Discover Adventure Easier Than Ever with New Map…

      July 27, 2023

    • New Maps
      • Gaia GPS

        Discover Prime Stargazing Locations with Our New Light…

        August 15, 2024

        Gaia GPS

        Find Prime Viewing for Total Solar Eclipse with…

        March 27, 2024

        Gaia GPS

        See the World More Clearly with New Gaia…

        May 18, 2023

        Gaia GPS

        Gaia Classic: The Only Map You’ll Ever Need?

        May 4, 2023

        Gaia GPS

        Why NatGeo Trails Illustrated are America’s Favorite Maps

        February 9, 2023

        Backcountry Skiing

        Find Backcountry Skiing in Gaia Winter Map

        January 11, 2023

        Gaia GPS

        Our Favorite New Maps and Features

        December 23, 2022

  • Activities
    • Backcountry Skiing
    • Boating
    • Emergency Response
    • Fishing
    • Offroading
  • Adventures
    • User Stories
  • Help
Top Posts
The Hike Map That Broke Me: How Gaia...
A Fond Farewell to National Geographic Maps —...
Introducing the Gaia Hike Map: Your Trail-Ready Adventure...
Download the app and get a free 14-day...
Gaia GPS is Improving Satellite Imagery: Saying Goodbye...
How I Used Gaia GPS to Navigate Italy
Gaia GPS x Toyota: A New Way to...
Download Gaia GPS– iOS & Android App
Unlock a New Level of Personalization in Gaia...
Important Update: Changes to Esri World Imagery Offline...
Gaia GPS
  • Explore The Map
  • Get the App
  • Upgrade Today
  • Explore The Map Catalog
  • New Features
    • Gaia GPS

      The Hike Map That Broke Me: How Gaia…

      April 24, 2025

      Gaia GPS

      Introducing the Gaia Hike Map: Your Trail-Ready Adventure…

      March 18, 2025

      Gaia GPS

      Unlock a New Level of Personalization in Gaia…

      December 12, 2024

      Gaia GPS

      Goodbye Clutter, Hello Streamlined Maps: Introducing Sync to…

      November 26, 2024

      Gaia GPS

      Discover Prime Stargazing Locations with Our New Light…

      August 15, 2024

      Gaia GPS

      2023 Mapped: Our Best New Features of the…

      December 27, 2023

      Gaia GPS

      Discover Adventure Easier Than Ever with New Map…

      July 27, 2023

    • New Maps
      • Gaia GPS

        Discover Prime Stargazing Locations with Our New Light…

        August 15, 2024

        Gaia GPS

        Find Prime Viewing for Total Solar Eclipse with…

        March 27, 2024

        Gaia GPS

        See the World More Clearly with New Gaia…

        May 18, 2023

        Gaia GPS

        Gaia Classic: The Only Map You’ll Ever Need?

        May 4, 2023

        Gaia GPS

        Why NatGeo Trails Illustrated are America’s Favorite Maps

        February 9, 2023

        Backcountry Skiing

        Find Backcountry Skiing in Gaia Winter Map

        January 11, 2023

        Gaia GPS

        Our Favorite New Maps and Features

        December 23, 2022

  • Activities
    • Backcountry Skiing
    • Boating
    • Emergency Response
    • Fishing
    • Offroading
  • Adventures
    • User Stories
  • Help
Tag:

hiking

Backcountry SkiingGaia GPSNew Maps

Find Backcountry Skiing in Gaia Winter Map

by Abby Levene January 11, 2023
written by Abby Levene

Discover backcountry ski zones, snowmobile trails, and trails for every winter activity with our new and improved Gaia Winter map. Complete with world-wide ski resort maps plus nordic, fatbike, uphill skiing and snowshoe trails, Gaia Winter serves as the go-to map for winter travel. We’ve updated it to make it even more useful for your adventures.

Just like our original Gaia Topo, Gaia Winter comes with industry-leading clarity and download efficiency. Download the map for your entire state so you can always have a map on hand, even when you lose cell service. From backcountry ski zones to snowmobile trails to enhanced tree cover, read on to learn about the improvements and how to get the most of Gaia Winter this season.

Discover Backcountry Skiing

Backcountry skiers planning their next tour have come to the right place. We’ve added popular backcountry ski zones to the map. Areas shaded in blue show where you may find places to tour. Regions shaded in orange illustrate starting points.

Our cartographers created these backcountry start and ski zones based on where users started recording ski tracks and where their tracks took them, respectively. Backcountry ski zones are mostly contained within North America now. And you’ll also find a few zones in Iceland, Norway, and France.

Spy Snowmobile Trails

snowmobile trails in Gaia Winter

Sledders can now discover snowmobile trails right on the map. We’ve added all the snowmobile trails from our Snowmobile Trails map to Gaia Winter for your convenience. Before you go on your next tour, download Gaia Winter for offline use so you have a trail map on hand. That way you can reroute on the fly, find somewhere to refuel, or navigate in a white-out. 

Get even more trail details including grooming status, access dates/restrictions, trail width, difficulty level, trail length, and direction of travel with our interactive Snowmobile Trails map. Pair this trail overlay with Gaia Winter for optimal planning and navigation. 

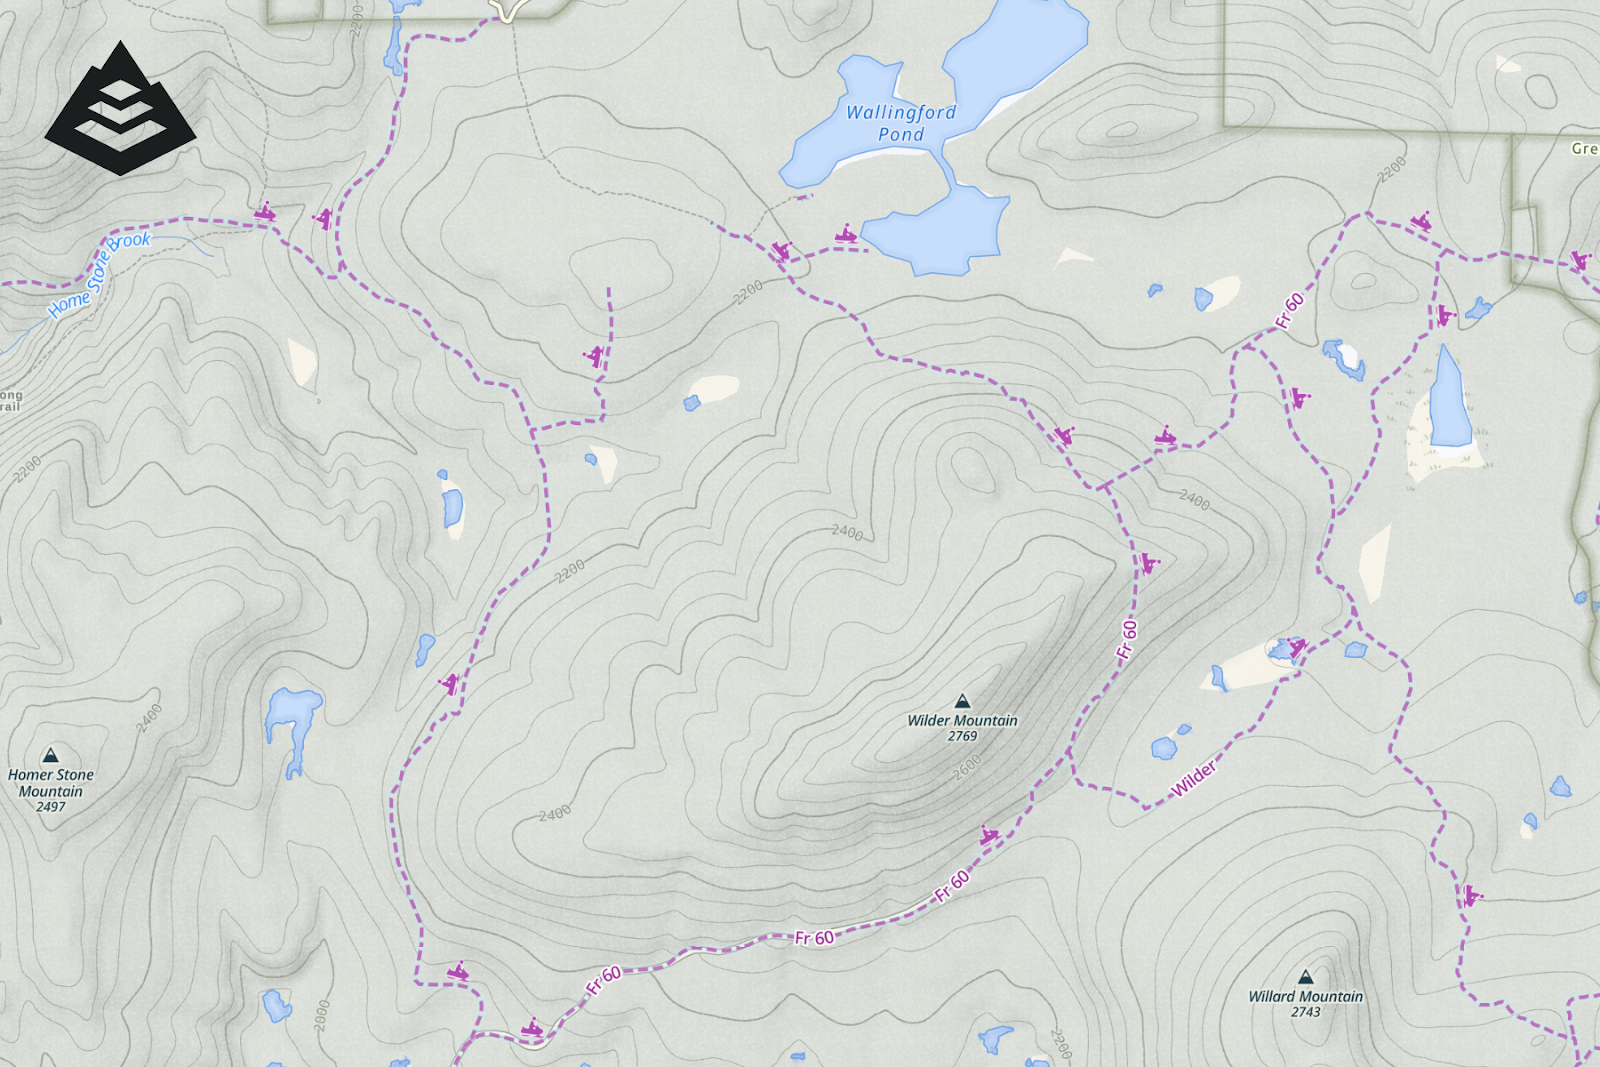
Understand Landcover and Topography

Say goodbye to the blues. We’ve revamped the color palette to make Gaia Winter brighter, with more detailed landcover. As you’re planning your next ski tour, use Gaia Winter to see if you’ll be skinning over shrubs, through trees, or across tundra. Sledders can see if they’re traveling past prairies or farmlands. 

The winter-themed color palette of the map sets a seasonal tone and enhances its utility. Tour the backcountry with confidence thanks to a stronger emphasis on terrain, tree cover, and contour lines. Mountains pop out of the map, helping you scout the best uphill and ski lines. See exactly where treeline ends so you can find powdery bowls and untracked glades. Hiking, mountain bike, and other three-season trails are deemphasized to make it even easier to see ski, snowshoe, and fat bike trails.

Activate Snow Mode

Gaia Winter’s less diverse color scheme also pairs perfectly with our safety and weather maps. Pair Gaia Winter with our suite of winter safety maps, including Slope Angle shading, Avalanche Forecast, Snow Stations Daily, Snow Depth, and Satellite Imagery to help you plan safer tours. Check out our primer on how to use maps to help avoid avalanches for a refresher.

Trails for alpine skiing, cross country skiing, snowshoeing, fatbiking, uphill skiing, and snowmobiling are indicated by line type. And now you can also distinguish trail activity type thanks to icons right on the trails themselves. 

Gaia Winter is Available with a Premium Membership

Gaia Winter is available on the web and in the Gaia GPS app with a Gaia GPS Premium membership. To access this map, visit the layers menu and search for “Gaia Winter.” Or from the layers menu, select “Topo Maps.” Scroll down and tap “Gaia Winter.” Tap the “Add Layer” button. Learn how to add and manage overlays here.

A Premium Membership also gives you access to Gaia GPS’s entire map catalog, including a suite of avalanche safety maps. These include Slope Angle, Avalanche Forecast, recent satellite imagery, Snow Stations (Daily), Snow Depth, and snow forecast maps. Read up on how to use maps to help avoid avalanche danger.

Plus, with Premium, you can layer maps together. For example, you can place the Slope Angle map on top of Gaia Winter to find the best low-angle terrain. And you can download your maps (including Gaia Winter) for use without cell service, as well as print maps so you always have a backup.

Take winter to the next level. Join Gaia GPS Premium with Outside+ to get one subscription to fuel all your adventures, thanks to access to Trailforks Pro, Outside, SKI, Trail Runner, Outside Watch, and more. 

January 11, 2023
1 FacebookTwitterLinkedinRedditEmail
Hiker stands looking at the view of snowy mountains
Gaia GPSHow-To

The Art of Layering

by Angela Crampton October 26, 2022
written by Angela Crampton

When it comes to layering for cold-weather adventures, seemingly tiny decisions can make or break a trip.

Snowy landscapes on crisp mornings sound magical. But in cold weather, the stakes are higher. Wearing the wrong clothes can leave you either too cold or too damp from sweat—both of which can lead to exposure-related conditions like frostbite and hypothermia.

That’s where the art of layering comes in. Knowing how to dress for winter hiking is all about knowing how to keep your body on that Goldilocks-fine line between too hot and too cold. Read on to figure out how to dial in your own winter layering system and enjoy your next winter hike in comfort.

Wick Away Moisture with Baselayers

A man walks down a snowfield with crampons, a backpack, and many winter layers.

Let’s start with your first layer. Your baselayer lies against your skin. It both provides warmth and wicks moisture away from your body to keep you feeling dry. Synthetic and wool fabrics, especially lightweight Merino wool, offer the best wicking capabilities. Wool also has the added benefit of natural odor-fighting properties. Cotton, however, absorbs sweat and will leave you feeling clammy. Save it for summer.

Your baselayer should be fairly thin. It can be short-sleeved or long-sleeved depending on the weather and how much you heat up when you really get moving. If you start overheating the minute you hit an incline, a short-sleeved layer or a shirt with a zipper will help you dump heat fast and avoid building up sweat. If you expect blowing snow or windy weather, you’ll be happier with long sleeves or a short-sleeved shirt under a wind-blocking layer like a softshell jacket or lightweight wind shirt.

Baselayer bottoms are also a personal preference. Even a thin pair of athletic tights or long underwear under your pants can make a serious temperature difference. But if you’re prone to sweaty legs, your winter hiking pants might keep you warm enough by themselves.

Insulate with Midlayers

A hiker stands with their back to the camera, gazing down from the top of a mountain onto mountains, a lake, and plains covered in snow. They're wearing a headband, winter coat, and a backpack.

A midlayer traps body heat to keep you warm and to continually dry your baselayer. These come in various weights—everything from a thin Merino wool hoodie to an insulated vest to a lightweight down jacket can count as a midlayer.

Breathable fleece is a popular option. It’s fairly warm for its weight, and the breathability allows sweat to dry fast, though that also means it provides little defense against wind. The close-knit fabrics of insulated synthetic mid-layers add both stretchiness and improved wind-resistance.

Down sweaters (puffy, down-filled jackets) offer the most warmth per ounce and pack down smaller than other materials. However, they only work if they stay dry. Down provides warmth by trapping hot air in the thousands of tiny air pockets that form between feathers. Get it wet, and the limp feathers will provide far less warmth than a damp wool or synthetic layer.

As the temperature dips, you might use more than one middle layer. For example, on a 10°F day, you might wear a thin Merino wool baselayer and a synthetic-insulated vest followed by a down sweater. All that goes under your outerlayer, or shell.

Keep out the Weather with Shell layers

A person walks away from the camera up a snowfield. They are wearing crampons, holding ice axes, and have on a backpack and down coat.
Photo: Anurag Nallavelli

Also known as a shell jacket, your outer layer protects you from wind, rain, and snow.

Soft Shells

Soft-shell jackets are stretchy, breathable, and water-resistant. They’re great for repelling snow in dry climates and most have a water-resistant coating that can keep out light rain and wind.

Many winter hiking pants or alpine climbing pants are made of a soft-shell material. The stretchiness and breathability make them great for steep climbs in deep snow.

Hard Shells

Hard-shell jackets are essentially rain coats. They have a waterproof membrane (like Gore-Tex) in addition to a water-repellant coating, which leaves them fully waterproof. They also block wind and retain more warmth, but they offer less stretch and far less breathability.

Hard shells shield hikers in mixed weather conditions and keep other layers dry, but even the most well-advertised “waterproof breathable” fabrics trap water vapor from sweat. Some come equipped with zippered vents in the armpits or sides to help keep air circulating, but the general rule is that if you’re working hard in a waterproof jacket, you’re going to sweat.

For winter hiking, you should always carry a waterproof jacket, even if you don’t expect rain or snow. For a full guide to choosing the right rain jacket, we recommend Adventure Alan’s Rain Jacket 101.

Protect Your Extremities

It’s easy to forget the extras, but your fingers, toes, ears, and face are the most prone to frostbite in cold conditions.

Head

You can regulate your body temperature like a thermostat by either putting or taking off a hat. Bring a wool or fleece hat that covers your ears. A balaclava or neck warmer is also useful for protecting your face from wiping winter winds.

Hands

Invest in a good pair of insulated, waterproof gloves or mittens. In general, mittens are much warmer, but gloves provide better dexterity.

For really cold weather, pack a thin pair of liner gloves, as well. They act like a base layer and wick sweat away from your hands, and they’re useful to have if you want thin coverage while working hard or while performing high-dexterity tasks like adjusting ski or snowshoe bindings.

Feet

Wear wool or synthetic socks to keep your feet warm even when sweat builds up. If you’re prone to blisters, also consider a thin liner sock to reduce friction. Make sure your socks are thick enough to provide adequate warmth, but not so thick that they’ll impair circulation by taking up too much space in your boot.

Consider packing extra socks. Feet can sweat even in very cold temperatures, and you may want to switch out socks halfway through a hike if your feet aren’t drying or warming up.

In deep snow, wear gaiters to keep snow out of your boots. Waterproof and durable, gaiters attach to your boot laces and typically extend to just below the knee.

Listen to Your Body

A hiker turns their face against the wind. They're carrying poles, wearing crampons, and have a backpack, hood, sunglasses, and winter coat. They're standing on a snowfield with mountains in the background.

Everyone handles extreme temperatures and responds to high cardiovascular output differently. A layering system that works flawlessly for one person might fall completely short for another. When you’re starting out winter hiking, pack more clothes than you think you need, and pay attention to cues from your body to determine when you need to add or subtract layers.

The only exception: When you stop hiking, layer up before you get cold. It’s easier to stay warm than to get warm.

October 26, 2022
9 FacebookTwitterLinkedinRedditEmail
Joshua Tree National Park at sunset
AdventuresGaia GPSHikes

Discover the Ultimate Winter Getaway with These Ten National Parks

by Mary Cochenour October 11, 2022
written by Mary Cochenour

Some of America’s national parks are best visited in the winter. The off-season brings the possibility of more solitude, dramatic snow-dusted scenery, and cooler, more comfortable temperatures in areas with extreme summer climates, like the Everglades and Death Valley. Whether you’re craving a warm, summer-like hike in the depths of winter or looking for a snowy adventure far away from the crowds, explore these 10 national parks for a variety of winter-season adventures.

Two sets of footprints cross a sand dune in Death Valley with blue skies overhead.

Desert Adventures

1. Death Valley National Park

Winter brings cooler temperatures and fewer visitors to Death Valley — the hottest place on earth. Located on the California and Nevada border, Death Valley commonly surpasses the 120-degree Fahrenheit mark during the months of July and August. This sweltering summer heat makes outside activities like hiking, biking, and even sightseeing uncomfortable and downright dangerous.

In winter months, you’ll find the less extreme side of Death Valley. From December through February, temperatures cool to the 60s to 70s F in the daytime, making it possible to get out of air-conditioned cars and explore the park’s sand dunes, colorful geological formations, and sunbaked playas, including Badwater Basin, the lowest point in the U.S. at 282 feet below sea level.

Recommended Hikes:

  1. Darwin Falls, 2 miles, 376 elevation gain 
  2. Zabriskie Point Loop 6.8 miles, 827 elevation gain
  3. Sidewinder Canyon, 1.8 miles, 505 feet elevation gain

Winter Tip: Wildrose Peak (9,064 feet) and Telescope Peak (11,049 feet) may be covered in snow, so stick to the lower elevation trails.

2. Joshua Tree National Park

The most unique of all the desert landscapes, Joshua Tree National Park hosts the fuzzy Cholla cactus, interesting rock outcroppings, and the region’s trademark Joshua Tree — a spiky member of the Yucca family found in no other place in the world. The park’s diversity is owed to its varied elevation, ranging between 1,000 and 5,500 feet and spreading across two of California’s deserts, the Mojave and the Colorado.

Even though Joshua Tree sits above sea level, midsummer temperatures swelter around the 100-degree F mark. You can count on spring and fall bringing mild weather and a lot of visitors. Winter, with its chilly daytime highs in the 60s F, attracts fewer crowds but is still comfortable enough to enjoy hiking and rock climbing in this one-of-a-kind desert wilderness. 

Recommended Hikes:

  1. Skull Rock Loop, 1.8 miles, 121 feet elevation gain
  2. 49 Palms Oasis, 3 miles, 349 feet elevation gain
  3. The Maze Loop, 6.2 miles, 393 feet elevation gain

Winter Tip: Expect wild temperature swings from day to night and don’t be surprised by the occasional snow storm in mid-winter season. 

A desert canyon, with steep rock walls and a calm river flowing through the bottom of the canyon.

3. Big Bend National Park 

With over 150 miles of trails, Big Bend National Park presents a winter hiking paradise with balmy daytime temperatures averaging in the 60s F and the chance of snow slim to none. Located in a remote area of southwest Texas along the border of Mexico, Big Bend’s enormous landscape offers a variety of desert terrain that stretches from the banks of the Wild and Scenic Rio Grande at 1,850 feet to the 7,832-foot Emory Peak in the Chisos Mountains. In between the summit and the river, explore desert slot canyons, dry washes, and barren landscapes. 

As a general rule, count on a 20-degree F temperature variance between the highest and lowest points in the park. This variety in temperature makes it easy to select a hike with a comfortable climate no matter what the forecast. Hike the trails near the river for warmer weather and head high into Chisos Mountains for cooler temperatures. Because of this varied elevation, Big Bend is home to a diverse ecosystem, with over 1,200 species of plants, 450 bird species, and 75 mammal species, including mule deer, black bears, and coyotes. 

Recommended Hikes:

  1. Saint Elena Canyon, 1.4 miles, 564 feet elevation gain
  2. Boquillas Canyon, 1.3 miles, 98 feet elevation gain
  3. Emory Peak, 4.6 miles, 2,402 feet elevation gain

Winter Tip: Avoid Big Bend during the Christmas and New Year holiday season, one of the most popular times of the year to visit the park.

Snowy Mountain Adventures

Wide open snow field with steam rising from geothermal pools, under a blue sky.

4. Yellowstone National Park

With packs of wolves, herds of Bison, roiling geothermal pools, and steaming geysers, Yellowstone National Park offers one of the wildest experiences of any national park. But add a layer of winter into the mix and you’ve just upped the ante. In early November, four of the five roads leading into Yellowstone’s main attractions close to vehicle traffic, turning the park into a snowbound wilderness that is remote, untamed, and uncrowded — a feeling not easily achieved in the summer months when this popular park is crawling with tourists. 

To get to the park’s popular destinations, like the Old Faithful Geyser and the Grand Canyon of the Yellowstone, book a ride on a snow coach, take a guided snowmobile tour, or use your own snowmobile to participate in the park’s non-commercial snowmobile program. Once within the park’s interior, you can explore by ski, snowshoe or snowmobile, visiting steaming hot geothermal pools and exploding geysers. Or you can spend the day watching wildlife — bison, wolves, deer, elk, antelope, and eagles — endure the brutal cold season. Don’t expect to see any Grizzly bears though; they are sleeping the winter away and set to stir sometime in late March.

Recommended Ski and Snowshoe Trails:

  1. Canyon Rim Ski Trail, 4.5 miles
  2. Lone Star Geyser Ski Trail, 9 miles
  3. Observation Point Snowshoe Trail, 2 miles

Winter Tips: If you missed out on reservations for a snow coach or snowmobile ride, take a drive through Lamar Valley, accessible from the park’s north entrance in Gardiner, Montana. This road is plowed and open all year long, but in the winter it dead ends in Cooke City, Montana, a backcountry skiing and snowmobiling destination. The two-lane road travels through Yellowstone National Park’s famed Lamar Valley, where bison and packs of wolves live. Check the park’s webpage here for a list of available winter services. 

Snowy Mount Rainier pokes above the clouds with a colorful, pastel sunset of orange and soft pink hues int he background.

5. Mount Rainier National Park

Mount Rainier National Park, just a two-hour drive from Seattle, averages more than 53 feet of snowfall per year, making it the perfect place to play in the snow for almost six month out of the year. Only the hardiest of mountaineers attempt to summit the 14,411-foot peak in the winter months, but the lower elevations around Paradise and Longmire, offer plenty of opportunities for backcountry and cross country skiing, snowshoeing, winter hiking, and sledding. Hone your winter camping skills in the Paradise area. Be sure to pick up a backcountry camping permit at the Longmire Museum or the Paradise Visitor Center on the day of your arrival.

Recommended Winter Activities:

  1. Longmire Winter Trails
  2. Paradise Winter Snowplay

Winter Tip: Most roads in the park close for the winter, but visitors can access the park from the Nisqually Entrance to Longmire, which is open year-round except in extreme winter weather conditions. Check with the park’s road status page for updates on winter road conditions. The road from Longmire to Paradise opens at 9 am and closes for the night at 5 pm depending on weather, so time your visit accordingly. Never walk, ski, or snowshoe on the road to Paradise because road crews are operating snow plows and heavy equipment even when the road is closed.  

Mountain scenery with blue skies and tall rock face in the background and snow dusted evergreen trees on a field of snow in the foreground.

6. Rocky Mountain National Park

Rocky Mountain National Park, just outside of Denver Colorado, offers all kinds of snow-filled fun, including winter hiking, cross country and backcountry skiing, sledding, snowshoeing, and ice climbing. Before you go, you’ll have to decide whether to visit the east or west side of the park because Trail Ridge Road, which climbs to 12,183 feet and connects the two sides, closes to traffic in the winter months.  

Besides Trail Ridge Road, most of the park’s roads are open to travel, providing access to trails that are popular for hiking in the summer. If there is fresh now, you’ll want some sort of floatation to keep you on top of the snow pack, like skis or snowshoes. Chances are good though, that in popular areas, the trail will already be packed in from other hikers and suitable for walking in boots. Bring traction devices and trekking poles if the trails seem slippery with ice. Rocky Mountain National Park is truly a wilderness adventure, especially in the winter, so be cautious of avalanche danger when traveling within the backcountry of the park. Learn more about winter safety here. Check the park’s trail conditions page here to get updates on conditions for winter hiking or snowshoeing.

Recommended Hikes:

  1. Ouzel Falls 5.5 miles, 905 feet elevation gain
  2. Dream Lake, 1.8 miles, 735 feet elevation gain
  3. Fern Lake, 3.7 miles, 1,391 feet elevation gain

Winter Tip: The east side of the park attracts more visitors in winter months than the west side. The west side of the park gets more snow and offers more solitude.  

Snowy river rocks backdropped by snow covered El Capitan, Yosemite Valley's most prominent monolith.

7. Yosemite National Park

Yosemite’s 3,000-foot granite monoliths and giant pine trees dusted with snow make for a magical winter visit and well worth the 170-mile drive from San Francisco. What’s even more magical about Yosemite in winter is its lack of crowds. Anyone who has ever been to Yosemite in the peak seasons of late spring and summer will appreciate viewing the iconic rock faces of El Capitan and Half Dome in relative solitude. 

The elevation of Yosemite Valley is close to 4,000 feet. Snow can accumulate on the valley floor but usually not enough for snowshoeing or cross country skiing. Trails that ascend from the valley can be snow packed and icy. In addition to hiking, try ice skating at the Curry Village Ice Rink, snowshoeing to Dewey Point, or cross country skiing to Glacier Point. Yosemite also offers downhill skiing, snowboarding, and tubing at the Badger Pass Ski Area.

Recommended Hikes:

  1. Mirror Lake, 2.2 miles, 100 feet elevation gain
  2. Mist Trail, 1.5 miles, 1,217 feet elevation gain
  3. Dewey Point, 4.6 miles, 3,018 feet elevation gain

Winter Tip: Yosemite’s Tioga Pass is closed in winter, making Tuolumne Meadows inaccessible to everyone but backcountry skiers who are interested in a long skin up into the park. A 10-bunk ski hut is available in Tuolumne Meadows on a first-come, first-served basis, firewood included. Wilderness permits are required for overnight visits to the backcountry. 

A frozen waterfall creates an ice column in the forest of Smoky Mountain National Park.

8. Great Smoky Mountains National Park

Straddling the border of North Carolina and Tennessee, Great Smoky Mountains National Park is the most visited park in the nation with more than 11 million visitors annually. Winter is your chance to ditch the crowds. But the price you pay for a lonely, offseason visit will be cool temperatures in the 50s F and the possibility of hiking on snow-covered trails.

The trails in Smoky Mountain National Park wind through old growth forest, along a creek bed, and sometimes lead to a waterfall. If you’re lucky enough to visit after a cold snap, you might get the chance to see interesting ice formations and frozen waterfalls. Expect high temperatures in the 50s and 60s F in the lower elevations of the park with near freezing temperatures at higher elevations.

Recommended Hikes:

  1. Laurel Falls, 1.3 miles, 366 feet elevation gain 
  2. Alum Cave, 2.3 miles, 1,260 feet elevation gain
  3. Andrews Bald, 1.8 miles, 584 feet elevation gain

Winter Tip: Hike in the park’s lower elevations, where light snow falls just a handful of times each year.

Tropical Adventures

Black rocks along the ocean coast line view of Hawai'i Volcanoes National Park.

9. Hawai’i Volcanoes National Park

With year-round temperatures in the 80s F, Hawai’i Volcanoes National Park is your best bet for summer-like hiking in the middle of winter. Better yet, the Big Island’s sunniest days occur in December and January when there is only a 40-percent chance of cloud cover on average. So get out your shorts and sunglasses, and check out the park’s Mauna Loa volcano, considered the largest volcano in the world by both mass and volume, and the Kilauea volcano, the Big Island’s youngest and most active volcano. 

In 2018, the Kilauea volcano erupted. Lava flows gushed into residential areas, destroying hundreds of homes and much of the park’s infrastructure. At the same time, the park experienced thousands of earthquakes that collapsed the Kilauea caldera. Kilauea’s active lava flows are no longer present, and according to the park’s website, there is no molten lava to be seen anywhere in or out of the park. Even so, the park offers an impressive volcanic landscape of old lava flows, steam vents, and craters. 

Recommended Hikes:

  1. Puʻu Loa Petroglyphs, 1.2 miles, 33 feet elevation gain
  2. Waldron Ledge Loop, 2.9 miles, 463 feet elevation gain
  3. Mauna Loa, 13 miles, 2,641 feet elevation gain

Winter Tip: Believe it or not, winter weather can pummel the summit of Mauna Loa volcano which rises 13,678 feet above sea level. Temperatures at the top of Hawai’i’s volcanoes are often 20 degrees F cooler than at the park entrance. If you’re planning to tag the summit, wear layers and check in with the Visitor Center about weather conditions before going up top.  

An aerial view of green coastal lowlands surrounded by water in Everglades National Park.

10. Everglades National Park

Moderate temperatures, low humidity, and a lack of mosquitoes, make December through March the perfect time to visit south Florida’s Everglades National Park. At 1.5 million acres, the park’s considerable size includes coastal lowlands, pine forests, and freshwater slough ecosystems. Considered the largest subtropical wilderness in the U.S., Everglades is home to a wide variety of species, including an abundance of alligators, dolphins, manatees, panthers, and turtles. Wildlife viewing is at its best in the winter season. 

Pick your mode of travel: hike, bike, or kayak through the park. Pine Island and Flamingo trails, near the park’s main entrance in Homestead, Florida, offer a number of short, interpretive walks. Though it doesn’t sound inviting, Shark Valley offers the best bike trail along with an excellent chance to view alligators in the wild. Take a seven-day kayak or canoe trip on the 99-mile Wilderness Waterway, accessing some of Florida’s most remote coastline. 

Recommended Hike, Bike, and Kayak Trails:

  1. Shark Valley Loop, 14.7 miles, 24 feet elevation gain
  2. Pine Island and Flamingo Trails, interpretive trails
  3. Wilderness Waterway, canoe and kayak route 

Winter Tip: Winter is Florida’s dry season, making the park’s water holes the best chance to view wildlife. 

October 11, 2022
1 FacebookTwitterLinkedinRedditEmail
Gaia GPSHow-To

Avoid Smoky Skies and Wildfires with Our Suite of Weather Maps

by Abby Levene September 13, 2022
written by Abby Levene

Don’t let your weekend plans go up in smoke. Gaia GPS’s robust collection of weather maps can help you avoid current wildfires and find smoke-free skies. These real-time maps are available for free with a Gaia GPS account. Read on to learn how to use wildfire, smoke, and air quality maps to stay safe hiking, biking, or camping at your next destination.

Wildfires (Current): See Where Wildfires are Burning Now

Wildfire (Current) map.

Check where fires are currently burning with the Wildfires (Current) layer. This map shows the perimeter of fires burning throughout the U.S. and Canada. Click a fire on the map to get more information, such as its name, size, and perimeter date.

The Wildfire (Current) map is updated daily. Data comes from the U.S. National Interagency Fire Center (NIFC), Natural Resources Canada (NRCan), the Province of British Columbia, Alberta Wildfire, and the Government of Saskatchewan.

Wildfires (Satellite Detections): See Wildfire Hotspots Worldwide

Wildfires (Satellite Detections) map.

See hotspots around the world with the Wildfires (Satellite Detections) layer. This global map detects and displays heat on the earth’s surface. While most of the hot spots on the map indicate heat from fire, the map also detects other heat sources such as geothermal activity and lava flows.

Tap on the purple shading to get more information about the heat source. The Wildfire (Satellite Detections) layer is updated several times a day as new data is made available by the U.S. National Aeronautics and Space Administration (NASA).

Use the Wildfires (Satellite Detections) layer in conjunction with the Wildfires (Current) layer to see where a fire is still burning hot within the fire perimeter. You can also use the Wildfires (Satellite Detections) map to see fires not yet on the Wildfire (Current) map. Some wildfires remain undetected by the Wildfires (Current) layer, especially when the fire is brand new, in a remote area, or not being actively fought. However, both detected and undetected fires will appear on the Wildfires (Satellite Detections) layer in purple shading if they are still hot and actively burning.

Smoke (Current, 24h, 48h): Check the Smoke Forecast

Smoke map.

Not surprisingly, wildfires generate tremendous amounts of smoke. Surprisingly, that smoke can blow hundreds (and even thousands) of miles away. A wildfire in Oregon may make for hazy skies in Montana — or even Massachusetts. Even if you can’t smell smoke, the fine particulate matter hanging in the air can lead to adverse health effects and even premature death.

So don’t trust your nose to sniff out bad air. Use the Smoke Forecast maps to check detected levels of smoke in the area you plan to visit. Gaia GPS offers three Smoke Forecast layers: Current, 24-hour, and 48-hour to give you a picture of upcoming smoke trends. Each shows smoke concentrations on a color-coded scale. Click a region to see the smoke concentration and when that forecast was recorded. Keep in mind that these maps are forecasts from NOAA’s High Resolution Rapid Refresh model, and may not always be accurate.

Air Quality (Current, Tomorrow): Check the Air Quality Index from the EPA

Air Quality map.

Get an even more comprehensive sense of the air quality by consulting the Air Quality layers. These maps show the EPA’s Air Quality forecast right in your Gaia GPS account, and are updated daily. The Air Quality layer uses color-coding to indicate the Air Quality Index (AQI). AQI reports levels of some of the most common air pollutants: ozone (smog), particle pollution, carbon monoxide, sulfur dioxide, and nitrogen dioxide.

Consult this map to get an index rating with which you are familiar; colors on map are analogous to those used by the EPA. Choose from either the Air Quality (Current) or Air Quality (Tomorrow) map depending on when you’re planning to take off on your trip. Once again, keep in mind that these are forecast layers and may not be accurate.

Wildfires (Historical): See Burn Zones Across the U.S.

Wildfires (Historical) map.

Check to see if you’ll be traveling through a burn zone using the Wildfires (Historical) layer. This map shows where previous wildfires have burned across the U.S. More recent fires appear bright red, fading to paler shades as time passes by.

Use this map to get a sense of whether you’ll be traveling through barren burn zones with high sun exposure that also afford sweeping views. Foragers flock to burn scars to find an abundance of mushrooms and other edible and medicinal plants. Tap on a burn zone in the map to learn the name of the fire, the date of the burn, and the acreage affected. This map is available with a Gaia GPS Premium Membership.

How to Get the Wildfires, Smoke, and Air Quality Maps

To add the Wildfire, Smoke Forecast, and Air Quality maps to your Gaia GPS account:

  • Go to map layers icon.
  • Tap the “Add Map Layers” button.
  • Select “Weather Feature Overlays.”
  • Click on the maps you want to see.

With a Gaia GPS Premium membership, you can select several maps and layer them together to get a complete picture of the air pollution and active fires in your area. Use the opacity controls to further customize the map view.

Watch: How to Check for Wildfires and Smoke

Access More Maps with a Premium Membership

Gaia GPS gives you access to hundreds of maps, from high-resolution satellite layers to topo maps for around the world. With a Gaia GPS Premium Membership, you can layer weather and feature maps on top of your basemaps to customize information you need for your upcoming trip.

A Premium Membership also lets you download maps for offline use. Keep in mind, though, that many maps are regularly updated and cannot be downloaded. Check those weather and feature maps before you leave wifi or cell service.

Wildfires, Smoke, and Air Quality Maps are available with a free account, sign up here.

September 13, 2022
3 FacebookTwitterLinkedinRedditEmail
photo waypoint in Gaia GPS
Gaia GPSHow-ToNew Features

Top 10 Ways to Use Waypoints

by Abby Levene August 30, 2022
written by Abby Levene

Whether you’re marking water sources, saving prime camping spots, or capturing breathtaking views, waypoints provide an invaluable tool for navigating and documenting your adventures. That’s why we provide some of the most advanced waypoint technology on the planet to go along with our world-class maps.

We’ve incorporated your feedback to make waypoints even more customizable and easy to use than ever before. You can now color-code waypoints based on opened/closed, good/bad, by type, trip, time — you name it. There are no limits when it comes to how you can use waypoints.

To get your creative juices flowing, here are our top 10 ways to use waypoints on our adventures.

But first, what are waypoints?

waypoints on a map

A waypoint is a reference point that helps you determine where you are and how to navigate to your destination. Whether you’re hiking, bikepacking, overlanding, or fly fishing, waypoints can help you find your way. In Gaia GPS, a waypoint is a marker you place on the map to signify a feature, your location, or any other spot on the planet. That may be a flag marking a key turn, a photo showing a sublime alpine lake, or a tent emoji illustrating the best camp spot so you can find it again later.

Here are the top 10 ways we use waypoints on our adventures and even in daily life.

1. Plan Adventures on the Big Screen

As you map out new routes on your desktop at home, drop waypoints to mark the parking lot, key turns, and where you plan to stop for lunch. Don’t worry, your waypoints will automatically sync to the Gaia GPS app on your phone or tablet.

2. Navigate to Detours & Destinations

Gaia GPS’s powerful navigation tools allow you to get turn-by-turn directions to any waypoint with just the press of a button. Want to take a detour to the mining ruins? Just drop a waypoint on the map on your phone and Gaia GPS can guide you directly there. This feature also comes in handy for navigating to the summit, or making your way back to the trailhead. Just drop a waypoint for where you want to go and tap “Guide Me” (iOS/Android).

You can drop a waypoint at your exact location, place it anywhere on the map, or type in the coordinates — up to you!

3. Add Photos to the Map

Gaia GPS hack: you can make photo waypoints! Immortalize that breathtaking view, chronicle a burn field, or remember where that avalanche slid across the trail. Take a photo of your current location (iOS/Android), and it will automatically show up on the map, geotagged to that exact spot. Just hit the + button on the top bar of the app, and tap “Take Picture.” A camera waypoint will show up on the map. Tap it to see your photo, along with the time stamp for when it was taken.

4. Mark Campsites for Later

Whether you’re reserving a campsite through recreation.gov on Gaia Topo or happen to come across a prime dispersed camp spot on your adventures, drop a tent emoji on the map to mark it forever. Gaia GPS pro mountain athlete Kyle Richardson uses waypoints on multi-day bikepacking and running adventures.

“Before I leave for a trip, I mark potential bivvy spots with waypoints as I plan my route on Gaia GPS at home,” Kyle says. “I then drop waypoints at my exact camp spots so I can find them again next time.”

With your campsites marked on the map, you can find them even in the dead of night.

5. See Mile Markers

Break your route into manageable chunks by dropping a mile marker in 1-, 10-, or 50-mile increments, or whatever makes sense for your adventure. Likewise, drop a waypoint at each checkpoint along the route. For endurance events like ultra running races, many race organizers use Gaia GPS to share the race route with participants and they drop waypoints to signify aid stations along the course.

In fact, many trail and gravel riding races post GPX files of the course and aid stations on their website. Whether the file is on Gaia GPS or not, you can download the file and upload it to your Gaia GPS account (web/iOS/Android). That way, you can train and race along the course and know exactly where you are, when the aid stations are coming up, and ensure you’re on the right route.

6. Label Water Sources

From water sources to water crossings, water can play an integral role in every type of adventure. Make your life a little easier for yourself by dropping a waypoint when you come across a stream, lake, or water cache. (And of course, if you’re caching your own water, make sure you leave a waypoint so you can find it on route!)

You can even color-code water sources based on their status thanks to our new colorized waypoint feature. Mark good water sources in green and bad ones in red. If you have to ford a river or if you find a refreshing lake for a swim, mark it on the map!

7. Avoid Hazards

Drop waypoints to mark washed-out bridges, downed trees, or whatever impedes you on the trail. Document where you saw that big scary snake with a photo waypoint. Same goes with bottlenecks on route: add a waypoint to remember where there’s a locked gate or a “no trespassing” sign so you can easily reroute next time.

8. Note Trail Status

Is the trail open or closed? Mark it with a green circle, a red X, or use the new colorized waypoints to create your own color-coded system for closures and trail conditions. Drop a yellow pin if the trail is muddy, or a green one if it’s dry and good to go.

9. Add Reminders

Say goodbye to forgetting where you parked your car. Next time you leave your car in a hectic trailhead parking lot, at the airport, or tucked into a parking garage, drop a waypoint as you exit your vehicle so you can find it stress-free when it’s time to go home.

We recommend you pick up after your dog in the moment. But if you MUST leave a doggy wag bag on the trail, make sure you drop a waypoint so you remember where it is so you can — and will— pick it up. Same goes with stashed water bottles, extra layers, or whatever else you may have tucked away behind a tree to snag on your way home.

You can also drop waypoints for cool zones you want to come back and explore. That’s what Kyle does when he stumbles across climbing and bouldering areas: “If I’m out on a run and I find a sweet rock, I’ll drop a waypoint so I can come back with the right gear.”

10. Document Memories

You can use Gaia GPS as a memory book for your adventures, with waypoints marking the locations of key memories on your trips.

That’s what Denver-based teacher Ian Silberman did as he reflected on his relationship with Phoebe Novitsky. He added waypoints to mark their first hike, where they bonked a gravel ride, and where he texted Phoebe from his tent late at night. On top of Monarch Mountain one winter morning, Ian pulled out his phone to show her each waypoint on the map, pointing to the real-life locations in the distance. After reminiscing over their adventures outside, he pointed to the star on the map, directly where they were standing, before getting down on one knee.

As you mark memories on the map, remember that you can add notes to each waypoint to chronicle even more information. Just tap on the waypoint, and scroll down in the pop-up drawer until you see “Add Notes.”

Customize Waypoints Even More with a Premium Membership

Everyone can use waypoints on both gaiagps.com and in the app. To level up your adventures with custom waypoint border colors, upgrade to a Gaia GPS Premium Membership .

Gaia GPS Premium unlocks all of the maps, including the suite of National Geographic Trails Illustrated titles, MVUM, USFS, and weather maps. Plus, you can navigate offline and print your maps so you can find your way if you lose cell signal or if your phone dies.

August 30, 2022
6 FacebookTwitterLinkedinRedditEmail
Get ready to cover more ground, more quickly. (Photo: Andy Cochrane)
AdventuresGaia GPSHikesHow-To

Fastpacking 101: What You Need for This Running-Backpacking Hybrid

by Andy Cochrane May 5, 2022
written by Andy Cochrane

This article was first published by Outside Online. Get full access to Outside content along with Gaia GPS Premium by joining Outside+.

I have to confess, I find backpacking quite boring. And not for a lack of trying, either—I grew up backpacking with my parents and high school friends, and was even a guide on youth trips in Montana. I still get talked into a trip once in a while, but besides the camaraderie, backpacking feels monotonous, slow, and more complex than it needs to be. 

Fastpacking—or “shufflepacking,” as my friends and I call it—is the next evolution of wilderness trips for those who want to go farther and faster. Practically speaking, such an endeavor entails jogging the descents, shuffling the flats, power-hiking the hills, and eating a lot of snacks, all while carrying a minimalist pack.

To be clear, fastpacking is different from ultrarunning. It’s not a race, and you carry everything necessary to camp in the backcountry. It’s not exactly backpacking, either, but ultralight backpacking might be the closest analogue, since you pare down your kit to the absolute essentials in order to travel fast and light. Simply put, the biggest difference between backpacking and fastpacking is how you’re moving: by jogging instead of walking.

How to Get Started 

Generally, my life philosophy for attempting new activities is “Just wing it, learn from the mistakes, and do better next time,” but that’s terrible advice for fastpacking. Most of these trips go deep into the backcountry, and being so remote is inherently risky. You’re as likely to get into life-threatening trouble fastpacking as you are hiking or running, so take similar precautions. It’s important to understand your route, watch the weather, plan out your meals, and pack the right gear. And be ready for problems to arise—a sprained ankle 20 miles from the trailhead is not a headache to be underestimated but addressed with a first aid kit, layers, and a means of contacting help back home.

If you’re not already a proficient distance hiker and trail runner, fastpacking might feel like learning two or three sports at once. It’s possible to jump right into the deep end, but expect some miscues along the way. For example: on my first trip, I overpacked, and my shoulders paid the price. Hopefully, this guide will help you get started and avoid the most common mistakes. Most of it focuses on three main knowledge buckets—gear, nutrition, and fitness—plus some suggestions on where and when to fastpack and why you should consider it.

The author’s shufflepacking buddy on their second morning in Wyoming’s Wind River Range, preparing for another 25-mile day. (Photo: Andy Cochrane)

Gear 

Few brands make gear specifically for fastpacking, since it’s still a niche sport. But with a mix of ultralight backpacking equipment and trail-running apparel, you’ll be ready to tackle your first shuffling adventure in no time. The goal is not to buy the lightest or smallest pack (even though more weight and bulk are generally not your friends). Rather, think about bringing only essential items worth the weight and comfortable to wear while running.

The most crucial piece of gear is your pack. If you’ve ever tried to run with a heavy, traditional backpack, you know it can be uncomfortable, awkward, and cause injury. The ideal shuffling pack should be snug while running and should not restrict your form. It should also have enough storage to carry your gear, without dangling pots and pans like Frodo Baggins. A good target weight for a fully loaded pack is 15 pounds, give or take. 

This 30-liter Ultimate Direction pack ($180) is the best I’ve tried, because it has large front pockets, weighs just 1.5 pounds, and proves to be very stable on my back. You might notice that it doesn’t have load-bearing hipbelts, which actually is normal for shuffling packs, as it’s harder to run with weight on your hips; instead, packs employed by fastpackers are similar to packs and vests for running, putting the bulk of the weight on your back and shoulders. 

The next riddle to solve is clothing, which will vary somewhat depending on the conditions. Unless the forecast calls for extreme weather (in which case bring additional appropriate gear or consider rescheduling), keep your pack light and stick to just one set of clothes. I always bring an athletic shirt and running shorts for the daytime, then thermal base layers, hiking pants, and a puffy for at night, and an extra pair of socks. When it’s cold or wet, add in a rain jacket, hat, and mittens or gloves. As with most backcountry trips, avoid cotton, which will chafe when you sweat and doesn’t keep you warm when it gets wet. And don’t take this list as gospel—if conditions change, so should your gear.

Trail-running shoes with good grip and a high stack height make for ideal footwear, because the pack’s weight adds impact to each step. I like the Hoka Speedgoat ($145), because it’s well cushioned and light yet durable. Hiking boots are less than ideal, because they aren’t designed for the agility and movement of running. Of course, your own ideal shoes will vary depending on foot shape and running style, so test a few pairs before bringing them on a long trip in the backcountry.

Other essentials include a first aid kit, bear spray if you’re in bear country, a small knife and spork, and cord. Lastly, lightweight poles—I use the Black Diamond Distance Carbon ($150)—will protect your knees and help you climb up steep passes faster. 

There are a few electronics you should always bring, such as a headlamp, satellite phone or other backcountry communication device, and cell phone. You’ll want the headlamp not just for nights around camp—in the spring and fall (or on any trip ambitious in length), you’ll likely start or end at night. A Garmin InReach satellite phone helps provide communication from nearly anywhere, so you can bail out if things go wrong. And apps like Gaia GPS turn your cell phone into the best navigation tool out there. For long trips, an external battery to recharge your devices is handy to ensure that these crucial safety devices remain functional.

Last but not least, give some thought to your sleep system: a light tent, bivy, or tarp that will keep you sheltered and warm at night—but that doesn’t fill up your pack and weigh you down—is critical. I’m a big fan of the MSR Front Range ($320), which can fit up to four friends fairly comfortably. With an inflatable pad like the Therm-a-Rest NeoAir Uberlite ($190 and up) and a seasonally appropriate sleeping bag (a light bag or quilt for summer, and something rated down to 30 or 40 degrees Fahrenheit for the shoulder seasons), you’ll be ready to go.

Eat, Run, Repeat

Like all long-distance activities, the name of the game is caloric intake. As we know, not all calories are created equal. For races like a marathon or a 50K, you can and should focus on foods high in sugar and carbs, because they are easy to digest and burn quickly. But this strategy omits the fats, proteins, and other nutrients necessary for multiday outings. When you’re out for hours and hours, you need to give your body a chance to recover each night, so fast-burning foods are only half the game plan.

While on the move, carb-heavy snacks like gels, chews, stroopwafels, and electrolytes are key to avoid bonking. Balance these with calorie-dense fatty foods, like nuts, peanut butter, seeds, cheese, and meat, which burn longer and help you recover. Bringing dehydrated or freeze-dried meals for dinner will help keep your pack light and manageable.

While some fastpackers go without a stove entirely, I am not such a masochist. The MSR Pocket Rocket ($80) weighs just three ounces and enables hot meals at night and hot coffee in the morning, making its inclusion worth the weight. 

For hydration, I bring the easy-to-use Katadyn BeFree filtration system (from $45), which screws onto most flasks. You may be able to get away with drinking straight from the source, depending on the environment and water quality, but if you’d rather not risk it, bring along something like the MSR Guardian Purifier ($390) to filter out any bacteria or parasites.

Fitness

You technically don’t need to train before you go fastpacking, but it’ll make the trip much more enjoyable if you’re in sufficient shape for your itinerary. Start by running and building up your aerobic endurance, prioritizing distance over pace. You’re training to spend a full day on your feet without being completely wrecked at the end of it, not to win your local 10K.

Consider tailoring your training plan to your exact trip and the terrain you’ll be shuffling across. For example, if your route has a lot of vertical gain, do some weighted hikes and strength training. For my first trip, I followed an ultramarathon training plan and swapped the tempo workouts for hikes up the local ski hill. Just like running, the ramp-up for fastpacking should be slow and steady. To mitigate chances of injury, increase your mileage by 10 percent per week at most.

Takeaways

It’s easy to get started fastpacking; a trip can happen on any trail and at any time of the year. (I personally don’t necessarily recommend winter fastpacking trips, because cold and stormy weather requires more gear and thus a heavier pack, but they aren’t impossible, either). For first-timers, picking an established backpacking route and doing it faster and lighter, in mild weather is a great way to begin. This will help you nail down the basics while keeping it safe. Fastpacking trips don’t have to cover incredibly long distances, and they certainly don’t have to be in the backcountry. They’re just a way to unlock a new type of adventure—the rest is up to you.

When you buy something using the retail links in our stories, we may earn a small commission. We do not accept money for editorial gear reviews. Read more about our policy.

May 5, 2022
2 FacebookTwitterLinkedinRedditEmail
Heather Anderson sits with a cup of coffee in her tent.
Gaia GPSHow-ToOut and Back Podcast

A Definitive Guide to the Best Camp Coffee

by Mary Cochenour September 30, 2021
written by Mary Cochenour

How to listen: iTunes | Google Podcasts | Spotify | Stitcher | Pocket Casts | RadioPublic | Breaker | Castbox

Coffee is life for many of us. It’s our morning ritual, a jolt that shakes us out of the afternoon doldrums, and a pick-me-up when we need to burn the midnight oil. But in the backcountry, brewing the perfect cup can be complicated. A pour-over leaves you with messy grounds to haul out, and instant coffee often falls short on taste. We turned to some of our favorite professional hikers — Heather “Anish” Anderson, the Hiking Viking, Adventure Alan Dixon, and Liz “Snorkel” Thomas — to unmask the secrets to brewing the best cup of coffee in camp.

Turns out their methods for making coffee on trail are as wild and varied as their personalities.

It’s no wonder that Heather Anderson, one of the world’s most accomplished hikers, likes coffee. Heather has hiked the Appalachian Trail, the Pacific Crest Trail, and the Continental Divide Trail — three times each. She set speed records on the AT and the PCT and became one of just a handful of hikers to complete all three long trails in the span of one calendar year. With that kind of energy, caffeine must be involved.

“When you contacted me about this piece, I actually thought ‘wow I have a lot to say about coffee’. I could talk for a whole hourlong podcast about coffee,” Heather says. “I have used pretty much every method of preparation of coffee on trail and I think, at this point, with varying results.”

Oddly enough, Heather didn’t bother with coffee until desperation set in on the last leg of her record-breaking PCT thru-hike. She had been averaging more than 40 miles per day for almost two months straight when she hit a wall. On the last mountain passes in Washington, Heather caught herself falling asleep while walking in the dark. She pulled out the coffee.

“I think it was Folgers from a gas station, and I’m literally just dumping it into my water bottle with cold water and shaking it and then chugging it,” Heather says. “And that was how I got to Canada.”

After snagging the PCT record, which still stands today, Heather went after the AT record. She smashed it, this time getting her caffeine fix from food — Trail Butter. Soon she realized she’d like to try to hiking like, well, the rest of us. She set out on the CDT with her partner and brought along fresh grounds to brew really good coffee the whole way. Even though Heather prefers a pour-over or a French press to instant coffee, she explains that the barista lifestyle on a long trail isn’t easily accomplished. Her go-to when she’s focused on making miles? A quality instant brand that offers multiple servings in one package. Because one cup is never enough.

Hiking Viking drinking from a juice box.

But even instant coffee is too much trouble for some hikers. After all, you have to boil the water, and then open the packet, and stir in the coffee crystals. Eventually, when it finally cools down to a tolerable temperature, you’ll have to sit and drink it.

Hiking Viking, otherwise known as Thomas Gathman, doesn’t have time for that. A former Marine Scout Sniper, Viking has hiked the Triple Crown, completed the AT in winter, and is well known for his long, flowing, Norse-like beard. Arguably, one of the biggest personalities in the hiking community, Viking prefers his coffee fast and cheap.

“I don’t bring a French press. I don’t bring a pour-over. I don’t bring fresh grounds. I don’t bring a grinder. I don’t have that kind of time. I don’t play around like that,” Viking says. “We might buy the cheapest, crappiest coffee there is. It’s whatever saves us a penny and whatever gets the caffeine and the poop going.”

Viking has a point. Coffee is an investment of time and it adds weight to your backpack. A french press or a pour-over filter means extra gear to lug around, an assault on the most basic principles of ultralight backpacking. Can good backcountry coffee and ultralight backpacking co-exist?

Adventure Alan Dixon thinks so. Alan is founder of the trusted backpacking website www.adventurealan.com, where he posts gear reviews and how-to articles about reducing your backpacking weight. Alan is famous for carrying nothing more than he needs. But after enduring decades of bad coffee, Alan has finally endorsed a French press method and an award-winning pour-over contraption — each light enough to make the grade for ultralight backpacking. He unapologetically defends his decision to add a little extra gear and weight to his pack.

Adventure Alan sits cross legged with a pour over.

“Having a cup of coffee with people is good,” Alan says. “If I can do that for 1.8 ounces, I think it’s really on par with and sort of honed my adherence to ultralight backpacking.”

Bringing fresh grounds means you have to haul them out. If that’s a deal-breaker, Liz “Snorkel” Thomas has the answer for you. A Triple Crown hiker and AT record-setter, Liz is also an author of hiking guide books, an editor for BACKPACKER magazine and Treeline Review, and a writer for the New York Times.

A few years ago, the Times assigned Liz to write a story about the best backcountry coffee. She conducted a scientific, blind study on 14 brands of instant coffee. The testers: a panel of professional coffee connoisseurs.

“Some of it was really low quality, instant stuff,” Liz says. “But in the end, it seemed like a lot of people had very similar goals of what they wanted in an instant coffee and it was super fun to see what everyone’s results were regardless of whether they were in the backcountry or the front country.”

Want to hear Liz’s coffee taste test findings? Tune in to the Out and Back podcast. You’ll also find out the brands of instant coffee Heather Anderson uses on every trip, Viking’s coffee alternative, and the details on Adventure Alan’s 1.8-ounce coffee methods.

Liz Thomas sits with an insulated thermos in front of her tent.

Follow these four thru-hikers on Instagram: @anishhikes, @therealhikingviking, @1adventurealan,@lizthomashiking.

September 30, 2021
0 FacebookTwitterLinkedinRedditEmail
owl face in the dark
Gaia GPSOut and Back Podcast

Owls and UFOs with Ultralight Expert Mike Clelland

by Abby Levene September 9, 2021
written by Abby Levene

How to listen: iTunes | Google Podcasts | Spotify | Stitcher | Pocket Casts | RadioPublic | Breaker | Castbox

Ultralight backpacking expert Mike Clelland has slept outside as often as possible for decades. Cowboy camping one night 15 years ago, something happened that changed Mike’s life forever. He tried to dismiss it, but it happened again. And again. That series of events sent Mike down the unlikely path of studying how powerful coincidences connect us to the supernatural.

In this very special episode of Out and Back, Mike dives into the mysterious world of owl synchronicities — and their connection to UFO abductions. Yes, you read that correctly.

Mike sits on a rock while prepping lunch.

It all started with a highly charged owl encounter on top of a mountain.

“I saw the owls. And I heard a voice in my head that said, ‘This has something to do with the UFO’s. You are an abductee,” Mike recounts on Out and Back. “To feel that, and to hear it in my head, it changed the direction of my life. I started exploring the symbolic meaning of owls and their connection to the UFO contact experience. And it took over my life.”

Mike is a masterful storyteller and will leave you clutching your seat (or trekking poles) as he shares his first-hand encounters with owls and extraterrestrial life. He weaves his own narrative into the rich history of owl lore, dreams, shamanistic stories, and other first-hand accounts to reveal this mystical world lurking in plain sight.

Whether you’re a believer or a skeptic, you’ll want to tune in to hear Mike’s perspective. At the very least, you will never see the world the same way again.

Check out Mike’s book The Messengers, which dives into the overlapping worlds of owls, synchronicities, and UFO abduction. His companion book Stories from The Messengers goes further into the symbolic and literal links between owls and UFOs. Mike is also the illustrator and author behind a series of books on mastering outdoor techniques. And finally, check out Mike’s longstanding blog, Hidden Experience, and his podcast, The Unseen with Mike Clelland.

Last Episode: Overcoming Backpacking Fears with She Dreams of Alpine

Allison smiles next to a trail sign on the JMT.

Newbie and seasoned backpackers alike all hold fears around backcountry travel. Outdoor Backpacking Educator and Empowerment Coach Allison Boyle shares how to overcome them on the last episode of the Out and Back podcast. Allison is the face behind the ultra-popular blog and coaching service She Dreams of Alpine, which teaches women how to become safe, confident, and self-sufficient in the backcountry.

Allison shares her stumbling blocks when she started adventuring outside, and how her fears initially continued to grow as she gained more experience. She talks about the top three fears beginner backpackers face, and how to overcome them. She explains “trip resistance,” that dark cloud of anxiety that seems to float over your head the week before any trip — no matter your experience level. Learn how to quiet that inner voice telling you to abandon your plans, so you can get out and have a blast on the trail. Tune in to learn Allison’s favorite breakfast foods in the backcountry, the one item she can’t leave behind, and how she turned her outdoor passion into a career.

Follow She Dreams of Alpine on Instagram, check out the blog for tried and true advice (including the free Ultimate Outdoor Adventure Starter Kit), and consider signing up for She Dreams of Alpine’s Backpacking Badass program to learn how to become a confident and self-sufficient backpacker.

September 9, 2021
0 FacebookTwitterLinkedinRedditEmail
Allison smiles next to a trail sign on the JMT.
Gaia GPSOut and Back Podcast

Overcoming Backpacking Fears with She Dreams of Alpine

by Abby Levene August 26, 2021
written by Abby Levene
 

How to listen: iTunes | Google Podcasts | Spotify | Stitcher | Pocket Casts | RadioPublic | Breaker | Castbox

Newbie and seasoned backpackers alike all hold fears around backcountry travel. Outdoor Backpacking Educator and Empowerment Coach Allison Boyle shares how to overcome them this week on the Out and Back podcast. Allison is the face behind the ultra-popular blog and coaching service She Dreams of Alpine, which teaches women how to become safe, confident, and self-sufficient in the backcountry.

In this fun and informative conversation, Allison tells hosts Mary and Abby how a city girl from Houston, Texas ended up becoming a backpacking expert. It certainly didn’t happen overnight. Allison shares her stumbling blocks when she started adventuring outside, and how her fears initially continued to grow as she gained more experience. She talks about the top three fears beginner backpackers face, and how to overcome them.

“We’re scared of what we don’t know,” Allison says on Out and Back. “Things we do in our everyday life, like drive or walk down a busy city street, are more dangerous than anything we would do in the outdoors. It’s just, they’re more familiar to us and we’re able to step into those scenarios more. And if you’re a new backpacker, you can’t imagine yourself in the outdoors at all. Once you start building those experiences for yourself, those fears start to go away.”

Alison explains “trip resistance,” that dark cloud of anxiety that seems to float over your head the week before any trip — no matter your experience level. Learn how to quiet that inner voice telling you to abandon your plans, so you can get out and have a blast on the trail. Tune in to learn Allison’s favorite breakfast foods in the backcountry, the one item she can’t leave behind, and how she turned her outdoor passion into a career.

Allison smiles on the trail while holding her hiking poles over her head.

Follow She Dreams of Alpine on Instagram, check out the blog for tried and true advice (including the free Ultimate Outdoor Adventure Starter Kit), and consider signing up for She Dreams of Alpine’s Backpacking Badass program to learn how to become a confident and self-sufficient backpacker.

Next Episode: UFOs with Ultralight Expert Mike Clelland

Yes, you read that correctly. In the next very special episode of Out and Back, author, ultralight backpacking expert, and UFO historian Mike Clelland dives into the mysterious world of alien abductions.

Mike is a masterful storyteller and will leave you clutching your seat (or trekking poles) as he shares his first-hand encounters with extraterrestrial life. He tells the story of how an owl gave him a message on a mountaintop, leading to his fascination with UFOs. Whether you’re a believer or a skeptic, you’ll want to tune in to hear what Mike has to say about the natural and supernatural worlds.

In the meantime, check out Mike’s book The Messengers, which dives into the overlapping worlds of owls, synchronicities, and UFO abduction. His companion book Stories from The Messengers goes further into the symbolic and literal links between owls and UFOs. Mike is also the illustrator and author behind a series of books on mastering outdoor techniques. And finally, check out Mike’s longstanding blog, Hidden Experience, and his podcast, The Unseen with Mike Clelland.

Last Episode: Life With Fire

Amanda smiles for the camera in a hardhat.

As wildfires derail recreation plans across the West, former wildland firefighter Amanda Monthei makes sense of this new “normal.” Tune in to the last episode of Out and Back to get a behind-the-scenes view on what it’s like to fight fire, and how we can manage wildfires going forward.

“You can’t just exist superficially within the landscape,” Amanda says on Out and Back. “You have to be an active member of it. We’ve been suppressing fire for too long. We need to like recognize that fire very much belongs in these places.”

Amanda unearths why wildfires remain vital for ecosystem health, and how humans misunderstand this life force. She gets into the history of wildfire management in the U.S. and how we’ve primed conditions for fires of unprecedented scope. Amanda dives into what we can learn from indigenous fire management practices, and how we can better coexist with fire going forward.

Follow Amanda on Instagram, and check out her brilliant podcast on all things fire, Life with Fire.

August 26, 2021
0 FacebookTwitterLinkedinRedditEmail
Gaia Topo with Public Land (US) and Private Land (US) overlays on gaiagps.com
App UpdatesGaia GPSHow-To

Navigate Public and Private Lands with Gaia GPS

by Abby Levene June 24, 2021
written by Abby Levene

Find hidden game reserves, connect the dots on your big hiking loop, and camp in solitude using the Public Land (US) and Private Land (US) maps. This duo can be used in tandem to quickly and easily decipher public and private land right in Gaia GPS.

Always know where you can and can’t go with this toolkit in your pocket. Avoid trespassing, or see landownership if you want to ask for permission to pass through. Find those peaceful, obscure camp spots so you can beat the crowds. View who manages public land areas so you can find more info about camping regulations, vehicle accessibility, and hunting laws. Plus, the Public Land map just got even better. We’ve added 1.5 million acres to this map to give you an even more comprehensive look at federally-managed land across the US.

Whether you’re route planning on your desktop at home or navigating offline in the field, the Public and Private Land maps can assist on any adventure. Each map provides coverage across the entire US. Read on to learn how to use the Public and Private Lands maps on your next trip.

Public Land (US) Map

Discover state forests to explore in your backyard, or BLM land for camping during your next road trip. America’s public lands provide some of the best resources for hiking, offroading, bikepacking, fishing, kayaking, canoeing — you name it. The Public Land (US) map gives you the most current and comprehensive data of these government-managed areas.

Hikers, hunters, overlanders, and anyone exploring areas of mixed land ownership may want to consider using this layer, which emphasizes:

  • National and state forests
  • Parks and monuments
  • Wildlife refuges
  • Conservation lands and game preserves
  • Bureau of Land Management areas

Color-coded federal lands let you easily identify which government agency manages an area. Plus, this map just got even better. We’ve added 1.5 million acres of public land to the map to ensure you get the most accurate and comprehensive coverage available. This expanded coverage encompasses everything from nearly 327,904 more acres of land managed by the National Parks Service (an area the size of Grand Teton National Park) to 106,447 more acres of Forest Service land (the size of Antigua and Barbuda combined).

The updated layer draws on the most exhaustive and precise datasets available so you can find secret caches of public land you may never find otherwise. It displays the privately-held inholdings in federal and state parks that may not appear elsewhere, as well as smaller public lands missing from many popular maps. Bear in mind that not all of the areas in the layer will be open to the public, and watch for any restricted zones within otherwise accessible lands.

Private Lands (US) Map

Use the Public Land (US) layer in conjunction with its complement, the Private Land (US) map, to get access to land ownership data for every single state across the US. Various outdoor enthusiasts and professionals ranging from hunters to conservation officers and first responders can easily access critical information using the Private Land map. If you’re planning a hunt in a new zone, use the Private Land map to quickly scout the area and surrounding property lines. Bird hunters pursuing everything from pheasants in South Dakota to mallards on the US flyways also enjoy the quick access to land ownership data.

The Private Land map lets users easily view land ownership information and parcel sizes. Just tap on a land parcel to get more ownership information, including the address if publicly available. Property lines are marked by bright yellow boundaries that you can’t miss.

Downloading offline maps with the US Private Land overlay will benefit game wardens working with land owners in remote areas. Search and rescue personnel can use Gaia GPS as a single source for coordinating search efforts in areas with multiple land owners. Using both the Private Land map and the area feature, firefighters can use Gaia GPS to complete wildfire incident reports.

How to use the Public and Private Land Maps

Pair the Public and Private Land maps on top of your favorite base map, such as Gaia Topo or the Satellite Imagery layer, to get a quick and clear sense of land designation. Layering the Public and Private Lands overlays on top of the Satellite Imagery map proves especially useful for hunters who want a crisp areal view with property lines. Combining the Private Land and Public Land maps along with state-specific game management unit overlays will let you focus on the hunt and not worrying about where the big bull or buck you are stalking goes.

While you can see public land information right in Gaia Topo, area shading in the Public Land map gives you an even clearer picture. Add the Private Lands map to make sure you avoid trespassing, or so you can get permission to pass through a landowner’s property. Get detailed directions for layering maps together here.

Get the Public and Private Land Maps

Public Land (US) and Private Land (US) maps are available with a Gaia GPS Premium membership. Premium comes with the ability to layer maps on top of each other so you can see public and private land markers as well as topographic detail, landmarks and waypoints, and satellite imagery.

Going Premium also lets you download maps for offline use so you can always find your way and see whose land you’re on while in the field. A Premium Membership gives you access to Gaia GPS’s entire map catalog. Download hundreds of maps, including National Geographic Trails Illustrated, high-resolution satellite maps, weather overlays, and government-issued topo maps like USFS topo, all the USGS quad maps, and MVUMs.

June 24, 2021
0 FacebookTwitterLinkedinRedditEmail
Load More Posts

Categories

  • Adventures
  • Android
  • App Comparisons
  • App Updates
  • Backcountry Skiing
  • Boating
  • Company News
  • Emergency Response
  • Featured
  • Fishing
  • Gaia GPS
  • Gaia GPS Offroad Podcast
  • GaiaCloud
  • Hikes
  • How-To
  • Hunting
  • iOS
  • New Features
  • New Maps
  • Newsletter
  • Offroading
  • Out and Back Podcast
  • User Profiles

Recent Posts

  • The Hike Map That Broke Me: How Gaia GPS Turned an Overlander Into a Reluctant Hiker
  • A Fond Farewell to National Geographic Maps — And a Look at What’s Ahead
  • Introducing the Gaia Hike Map: Your Trail-Ready Adventure Buddy
  • Download the app and get a free 14-day trial of Gaia GPS Premium
    • Facebook
    • Twitter
    • Instagram
    • Youtube
    • RSS
    • Explore The Map
    • Get the App
    • Upgrade Today
    • Explore The Map Catalog
    • New Features
      • Gaia GPS

        The Hike Map That Broke Me: How Gaia…

        April 24, 2025

        Gaia GPS

        Introducing the Gaia Hike Map: Your Trail-Ready Adventure…

        March 18, 2025

        Gaia GPS

        Unlock a New Level of Personalization in Gaia…

        December 12, 2024

        Gaia GPS

        Goodbye Clutter, Hello Streamlined Maps: Introducing Sync to…

        November 26, 2024

        Gaia GPS

        Discover Prime Stargazing Locations with Our New Light…

        August 15, 2024

        Gaia GPS

        2023 Mapped: Our Best New Features of the…

        December 27, 2023

        Gaia GPS

        Discover Adventure Easier Than Ever with New Map…

        July 27, 2023

      • New Maps
        • Gaia GPS

          Discover Prime Stargazing Locations with Our New Light…

          August 15, 2024

          Gaia GPS

          Find Prime Viewing for Total Solar Eclipse with…

          March 27, 2024

          Gaia GPS

          See the World More Clearly with New Gaia…

          May 18, 2023

          Gaia GPS

          Gaia Classic: The Only Map You’ll Ever Need?

          May 4, 2023

          Gaia GPS

          Why NatGeo Trails Illustrated are America’s Favorite Maps

          February 9, 2023

          Backcountry Skiing

          Find Backcountry Skiing in Gaia Winter Map

          January 11, 2023

          Gaia GPS

          Our Favorite New Maps and Features

          December 23, 2022

    • Activities
      • Backcountry Skiing
      • Boating
      • Emergency Response
      • Fishing
      • Offroading
    • Adventures
      • User Stories
    • Help

    @2024 - All Right Reserved. Gaia GPS


    Back To Top